Thursday, May 24, 2012

Keep Calm - Scrap Africa Challenge 5

A DT project for Scrap Africa Challenge 5. Have a look at the details of the challenge as below and please join us in the fun :)

Hello dear friends of Scrap Africa!
We are very excited to bring you a new challenge today.
We must say that it was a lot of fun and surely it was challenging even for us to create our projects for this reveal.
So, here it is. First of all, please keep calm :-)) 
Off course all of you are familiar with this type of posters:
keep calm and carry on
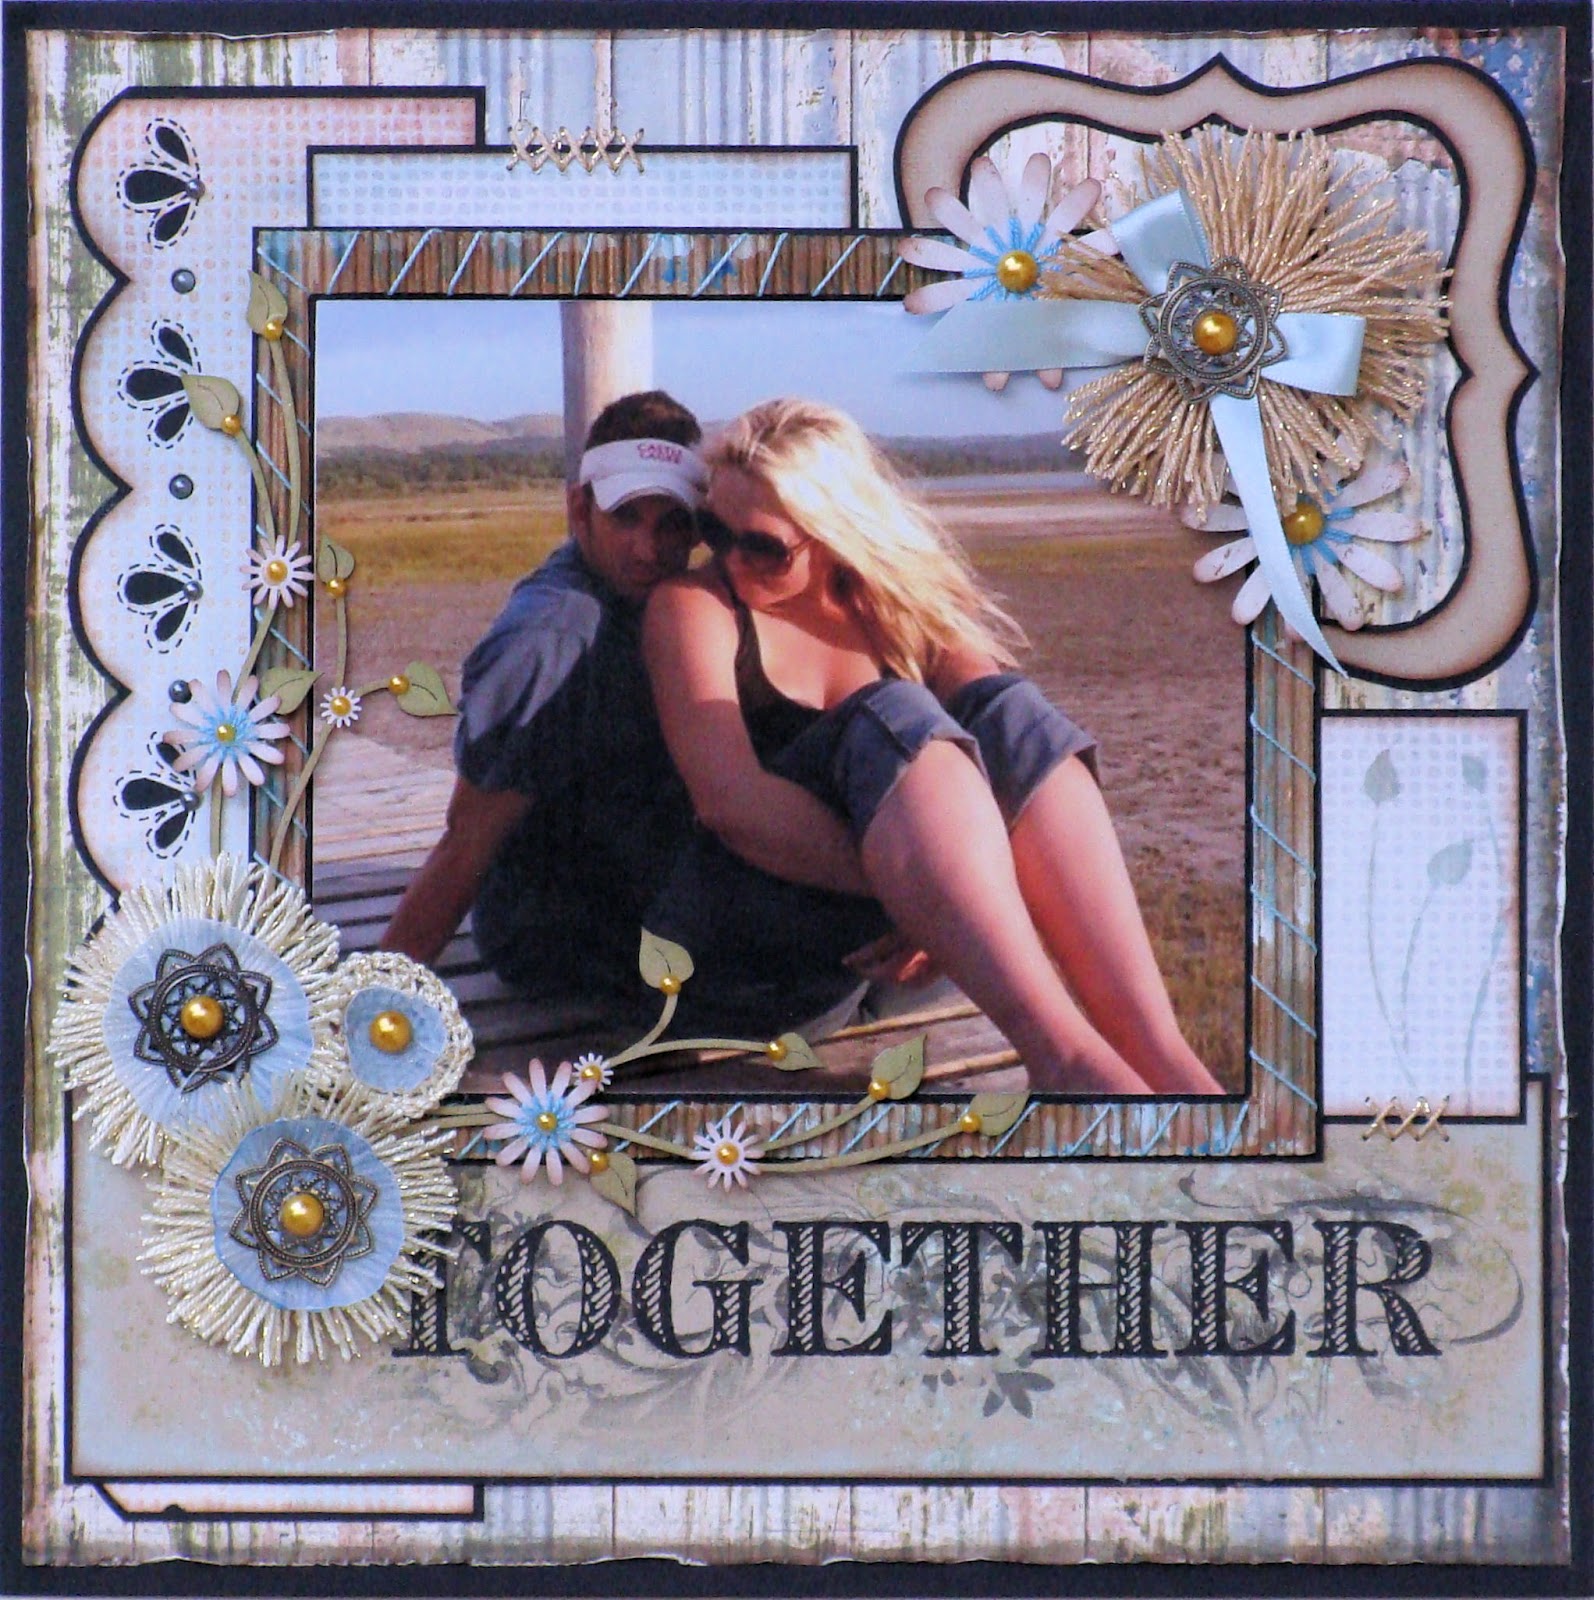
You will need to create any scrap project (a layout, a card or an altered object) with a phrase on it "Keep Calm and..." - the end of the phrase is up to you. Be funny, be creative, be thoughtful - whatever the moodyou are in, as long as you spread the calmness around :-)))
If you decide to create a poster featuring a phrase, make sure you think of something innovative and interesting: 
It must not be just plain letters on the plain background!
You can see some ideas of "Keep Calm" phrases on this Pinterest board

Thursday, May 10, 2012

Pure And Innocent - Scrap Africa Sketch 5

A DT project for Scrap Africa and we would love for you to play along with us this month as there really is some awesome prizes to be won :)  Our sponsor for this month is.... Kaisercraft!

This time we have two prizes for you. To stand a chance of winning one of two prize packs you need to take a part in one or two of our challenges 
(sketch # 5 and the up-coming in 2 weeks time challenge # 5).
Each prize includes:
35 sheets of paper, 3 paper pads, 3 packs of rub-ons, 3 packs of stamps, 1 pack of ribbons, 
1 pack of collectables, 1 acetate sheet , 5 sticker sheets (30 x 30).
These prize packs include materials from the brand new collections Magnolia Grove and Rock Pool, as well  as other 4 new collections that will be released in June and July. How cool is that? You don't want to miss this great opportunity!
And here is the sketch:

Picking Up Pebbles

My gorgeous little niece on the beach. I made this layout over a year ago but it remains one of my personal favorites. For this layout I used a sketch by the talented Robin Shakoor. The sketch may be seen here: http://robinshakoor.blogspot.com/p/sketches.html

Kissed By The Wind


Another layout of little Isabella on the beach. Another one of my personal favorites. This little girl will always be my favorite scrapping subject. I made this layout in December 2010.

Together

My beautiful daughter and her boyfriend at Cape Vidal.

Worn By Time .. Faded With Love

This was such a fun layout to do. Again, my little niece on the beach but in this layout I was particularly focused on her little shorts which I tried to replicate with paper.

One fine Day

My hubby on the beach in the Transkei many years ago.

Sleeping Beauty


Another layout I made many, many moons ago. My little girl fast asleep on the beach in the Transkei. This photo was taken 20 years ago :)

Exciting news - Flourish With A Bling DT Announcement

I have some lovely news to share with you...I have been chosen together with 19 other ladies from all across the globe to be part of the design team for Flourish With A Bling. Here are the names of all the other amazingly talented ladies and might I say that I am just a wee bit intimidated by all that talent :) 

Natalie Elphinstone – VIC, Australia
Suzette Edmond – United Kingdom
Jenifer Evans – USA
Jennifer Hodge – QLD, Australia
Kate McCulloch – NSW, Australia
Rae Moses – USA
Jeni O’Connor – Canada/Australia
Donna O’Leary – New Zealand
Elena Olinevich – Belarus
Angella Peardon – NSW, Australia
Ro Philippsen – South Brazil
Amanda Reddicliffe – WA, Australia
Candy Rosenberg – USA
Sandi Smith – Canada
Ilene Tell – USA
Sonia Thomason – WA, Australia
Sharryn Thomson – NSW, Australia
Chantal Vandenberg – SA, Australia
Emilia van den Heuvel – the Netherlands

A huge congratulations to avery one and a big thank you to Maggie, Lucy and Kate for the wonderful opportunity :)

Saturday, May 5, 2012

GDT project for Scrap Melody


I am extremely honored to have been asked to be a Guest Designer for the blog "Scrap Melody". Have a little peek at their blog at :http://scrap-melody.blogspot.com/2012/05/blog-post_2127.html . The theme is blues or jazz and the twist is to use either notes or a treble clef or both on the project. When I saw this picture of Milana, my step grand-daughter I was totally inspired by Frank Sinatra's "Come Dance With Me". To make the treble clef I simply threaded some beads onto wire and twisted it in the shape of a treble clef..I love working with beads :) I had so much fun doing that and proceeded to make a beaded bow which you can see underneath the flower on the left. Thanks for looking..I hope you like it :)

Thursday, May 3, 2012

Tutorial: Rosettes (For Miri)

Just a quick little tutorial on how to make the little rosettes we see so often.

Step 1
Cut a strip of paper 23cm long by 3cm wide and ink one long edge thereof.
Step 2
Use a pencil and make marks .5cm apart all along the uninked egde of the strip of paper and then use a scorer to score lines from the top to the bottom using the little marks as a guide (as illustrated below.)


Step 3
From one end start folding your strip of paper in a concertina style along the score lines as below.


Step 4
Glue the ends together ensuring that you don't break the pattern of the concertina as below. Miri, I usually use acid-free clear Bostik to glue the ends together.


Step 5
Once the ends are glued together your rosette will now resemble a cookie-cutter. Leave the glue to dry.


Step 6
While you're waiting for the glue to dry you can cut two circles  with a diameter of  3.5cm each.
Step 7
If you're sure your glue is dry you can now fold/twist the cookie-cutter towards the inside which means the uninked edge will form the inner circle of your rosette as below.


Step 8
Glue one of your circles onto the centre of the back which will keep your concertina folds together nicely as below. Wait for it to dry. Again, I use the acid-free clear Bostik for this and it dries quickly too.


Step 9
Glue the remaining circle on to the front. You may ink the edges of your circle first if you so wish. Leave it to dry.


Step 10
Embellish your rosettes however you wish. Here are just a few examples I made with some scrap paper.


Enjoy and have fun!!