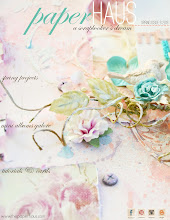
My Girl (Bo Bunny)
This is my take on Sketch 4 being a DT project for Scrap Africa. If you have some time please hop over to http://scrapafrica.blogspot.com/ and join in the fun. This is my beautiful daughter Heidi and you have no idea what an accomplishment it is to actually be able to get a photograph of her. She runs a mile when she sees a camera pointed at her and I was lucky to have caught her while she was very engrossed in conversation..LOL! I have done two little tutorials below just to show you how I have done the stitching on this layout.


You actually have no idea how nervous I am about doing this tutorial :( I am still trying to familiarize myself with this whole "blogging" thing and here I go and add to my agony :(( Ok, so this being my first tutorial I am going to have to ask you to please be patient with me while I try and figure out this whole HTML thing in order to try and get this post to look half-decent. There's got to be an easier way so if you have any suggestions, they would be most welcome :)) Did I mention that I've been sitting here for five hours now and still cannot get the text below the images in the order that I want it to appear but if I have to sit here for another five hours..so be it:(( Ok, here goes:
Step 1
I am going to attempt to show you how to achieve the "raised stitch" effect on your project with a few very simple steps. Draw a pencil line where you want the stitching to go and pierce tiny holes about .5cm all along the pencil line. Like this:

Step 2
Thread your needle with two strands of yarn in the colours required for your project. I used crochet yarn. You can also use a single strand of yarn but two strands is so much nicer and much more effective in order to get the end result :) make a little knot at the end of your yarn to prevent the yarn from slipping through the first hole. Now, insert your needle at the back of your work through your fisrt hole and bring it through to the front. Pull it through until the little knot meets with the back of your paper. Now, skip your second hole and insert your needle into the front of your third hole. Like this:

Step 3
Pull the yarn through to the back ensuring that you leave a little loop in the front. Like this:

Step 4
Insert your needle from the back into your second hole (that would be the hole between the two stitches or the little hole in the centre of the loop) ensuring that your yarn is situated above the needle. Like this:

Step 5
Now pull the yarn all the way through to the front applying enough tension so your stitch lies snuggly against the paper. Do not pull too tight or too hard as you don't want to tear your paper or rip your little holes ;) Like this:

Step 6
Now your needle is in the front or the "right" side of your work so now you insert your needle into the fourth hole and once again you pull it through to the back ensuring that you leave a little loop once again. (Creating the little loop just makes it that much easier for your needle and yarn to come through to the front underneath the yarn or else you may hook a tiny strand of the yarn and you end up ruining the whole stitch.) Bring your needle through to the front by inserting it into the back of your third hole and coming through to the front underneath the loop. Like this:

Step 7
Now pull your yarn towards you until once again your stitch lies nice and snuggly against the paper. Next you will insert your needle into hole 5 from the front to the back of your work creating a little loop again and then inserting your needle into the back of hole number 4 coming through to the front underneath the loop and pulling it tightly. So now you continue in this fashion and your row of stitches should start looking like this:

Side view of the stitching: This will give you a pretty good idea of how the raised stitch should look if you look at it from the side :)

And voila..you've done it!! If you happen to try this method, please feel free to leave a link to your project so I can admire your work :) I would love to see it xx I sincerely hope that this tutorial makes sense to you and if not, please let me know so I can try and improve on it :)
Here are a few more steps to show you how I have done the stitching on the scalloped circle:
Step 1
Cut a scalloped circle according to the required size. Within the circle draw a smaller circle. Then you will prick tiny holes on this circle, each hole being opposite and in line with the valley of each scallop..like this:

You can make all the holes at once or you can do it as I did..one at a time.

Step 2
Now thread your needle with the required colour thread and insert your needle from the back of the paper into the first little hole...like this:

Step 3
Pull your needle through to the front and take the thread over to the back between your first two scallops like this:

Step 4
Your needle and thread is now at the back of your paper and so now you insert your needle into the next little hole and thread it through to the front. You will find that the little valley/ditch between the scallops anchors your thread securely. Like this:

Step 5
Now take your thread across to the opposite side of the scallop creating a cross-stitch because that is all it basically is..cross-stitch on a scalloped circle. Like this:

Step 6
So now you have your first cross :) Now you only need to continue in the same fashion all along the circle..like this:


Step 7
When you have finished all the stitches along the circle it should look like this and you need not worry about the pencil line because your other circle will hide the pencil line once you have placed it like this:


And there it is all done! Have fun and enjoy!x
PS: It is three hours later and I have managed to compose it and at the same time expanded my knowedge just a little bit more in terms of HTML codes, so if you see this on my blog then you know I was successful....now I'm off to bed although I doubt that I'm going to get much sleep after drinking all those mugs of coffee :((
Till next time
xx